Scanning an Entire Alphabet
Posted: Fri Mar 17, 2006 9:28 am
Scan at the Correct Resolution
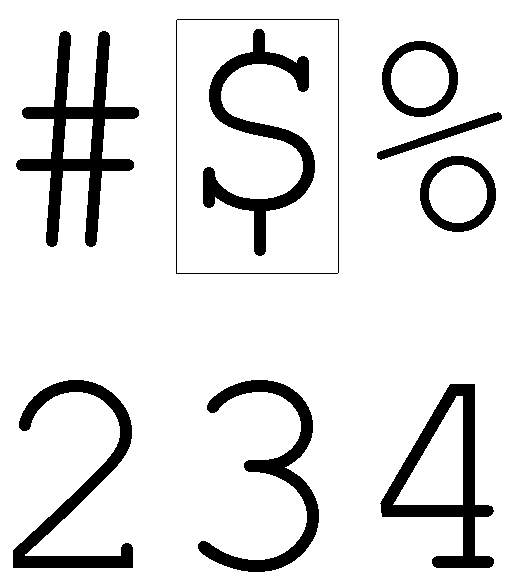
The recommended size for importing images into Font Creator is between 100x100 and 500x500 pixels. If your original is only 12 point text, which is 1/6th of an inch, a 2,400 dpi scan will be about right. It is recommended to use a larger original if possible, and scan at a lower resolution.
This image was made from 36 point text, exported at 600 dpi — equivalent to scanning printed 12 point text at 1,800 dpi. It is big enough for a good autotrace in Font Creator.
Open your scan in an image editor. Irfan View is ideal and free, so anyone can use it to follow this tutorial.
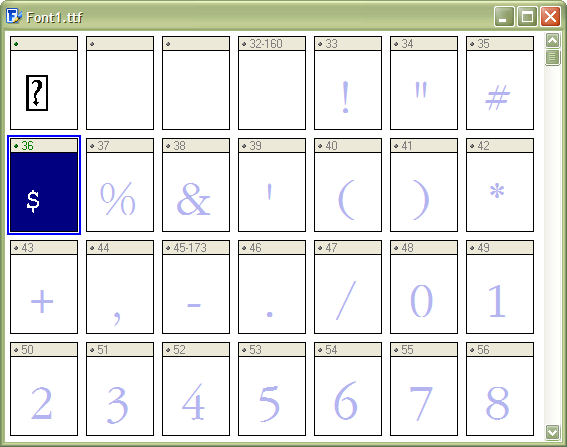
Importing One Character
Select one character by dragging around it with the mouse, and copy that to the clipboard.
Start a new Unicode font in Font Creator, and paste the contents of the clipboard into the appropriate character.
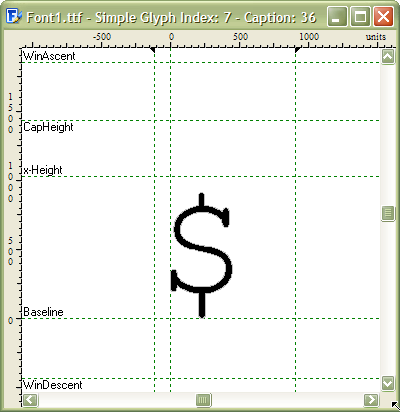
If the result is something like this size, it is good enough, but 2,400 dpi would have been better.
Note: You can change the smoothing and threshold on the Import Image dialogue by importing a single character, and by checking the box on that dialogue that says "Default." Thereafter, any outlines that you paste from the clipboard will use the new default settings.
You can continue pasting one character at a time, saving the font each time, until the entire alphabet has been imported.
Autometrics
From the Tools menu, select Autometrics to calculate suitable metrics for the imported glyphs. Font Creator will automatically calculate a width for each imported glyph, adding 40 funits of white space either side. You can adjust the amount of white space in the Autometrics wizard.
Resizing the Glyphs
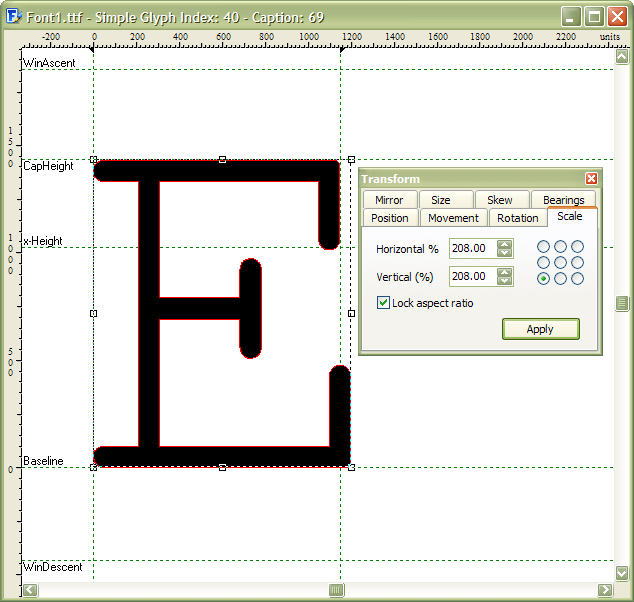
On the Format, Settings dialogue, on the Ranges tab, set the Contents and Layout to version 3, and set the CapHeight to what you want it to be for your font. Open the Glyph Edit Window and use the Transform toolbar to scale the glyph to the right size. Undo and try different values until you are satisfied with the result. Then undo again to return the glyph to its original size, noting what percentage transformation was required. (208% in this example)
Exit the Glyph Edit Window, select all of the glyphs, and use Tools, Glyph Transformer,¹ Outline, Scale to transform all of the imported glyphs by the same amount. You can also centre all of the glyphs horizontally, and set the left side-bearing to zero, in the same operation.
¹ Only available in the Professional Edition. In the Home Edition you will have to scale each glyph individually using the Transform Toolbar.
Then each glyph needs to be repositioned vertically on, or just below, the baseline. Glyphs with a flat base sit on the baseline, but glyphs with a rounded base should overshoot below the baseline by about 20 to 40 funits to align visually. The right amount has to be judged by eye. Use the Preview toolbar to see which letters are out of vertical alignment.
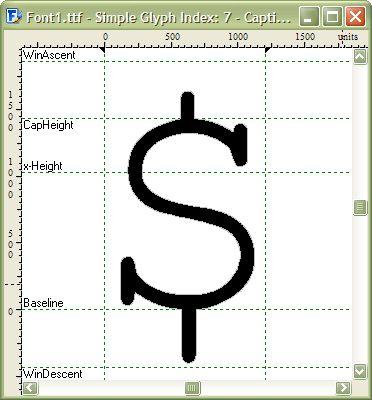
Some glyphs will descend below the baseline while others may ascend above the caps height.
The recommended size for importing images into Font Creator is between 100x100 and 500x500 pixels. If your original is only 12 point text, which is 1/6th of an inch, a 2,400 dpi scan will be about right. It is recommended to use a larger original if possible, and scan at a lower resolution.
This image was made from 36 point text, exported at 600 dpi — equivalent to scanning printed 12 point text at 1,800 dpi. It is big enough for a good autotrace in Font Creator.
Open your scan in an image editor. Irfan View is ideal and free, so anyone can use it to follow this tutorial.
Importing One Character
Select one character by dragging around it with the mouse, and copy that to the clipboard.
Start a new Unicode font in Font Creator, and paste the contents of the clipboard into the appropriate character.
If the result is something like this size, it is good enough, but 2,400 dpi would have been better.
Note: You can change the smoothing and threshold on the Import Image dialogue by importing a single character, and by checking the box on that dialogue that says "Default." Thereafter, any outlines that you paste from the clipboard will use the new default settings.
You can continue pasting one character at a time, saving the font each time, until the entire alphabet has been imported.
Autometrics
From the Tools menu, select Autometrics to calculate suitable metrics for the imported glyphs. Font Creator will automatically calculate a width for each imported glyph, adding 40 funits of white space either side. You can adjust the amount of white space in the Autometrics wizard.
Resizing the Glyphs
On the Format, Settings dialogue, on the Ranges tab, set the Contents and Layout to version 3, and set the CapHeight to what you want it to be for your font. Open the Glyph Edit Window and use the Transform toolbar to scale the glyph to the right size. Undo and try different values until you are satisfied with the result. Then undo again to return the glyph to its original size, noting what percentage transformation was required. (208% in this example)
Exit the Glyph Edit Window, select all of the glyphs, and use Tools, Glyph Transformer,¹ Outline, Scale to transform all of the imported glyphs by the same amount. You can also centre all of the glyphs horizontally, and set the left side-bearing to zero, in the same operation.
¹ Only available in the Professional Edition. In the Home Edition you will have to scale each glyph individually using the Transform Toolbar.
Then each glyph needs to be repositioned vertically on, or just below, the baseline. Glyphs with a flat base sit on the baseline, but glyphs with a rounded base should overshoot below the baseline by about 20 to 40 funits to align visually. The right amount has to be judged by eye. Use the Preview toolbar to see which letters are out of vertical alignment.
Some glyphs will descend below the baseline while others may ascend above the caps height.