Outline or Hollow
This is another easy transformation to use that generally works well.
Select all of the glyphs that you want to transform, and copy them to the clipboard (because Transforms cannot be undone). From the tools menu, select “Glyph Transformer” or click the Glyph Transformer icon on the Standard toolbar.
On the glyph Transform Wizard Dialogue, open the Outline script. The default weight of the outline stroke is 50 funits. Click OK to apply the transformation.
Before you proceed, and while the glyphs are still selected, paste the glyphs from the clipboard, and undo the paste operation. If you’re not satisfied with the result, you can now redo the paste operation and make adjustments to the transformation.
This is How the Transformation Works

The glyph gets bigger by 50 funits in each dimension, and a reversed (white) contour is generated inside of it. The dotted lines shows the original contours of the glyph. You may need to adjust glyph metrics to compensate for the slight increase in size (about 3% in this example), or you could scale the glyph by 97% in each direction to compensate for the increase in size.
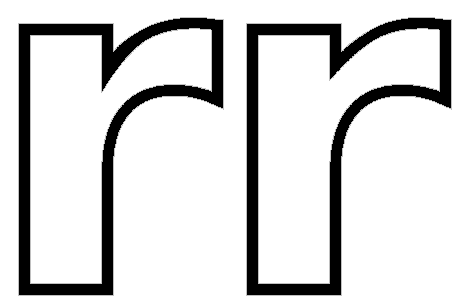
Problem Glyphs
As with most transformations, there may be some glyphs where it doesn’t work perfectly. Wherever there is a sharp change of direction in the contours, some manual adjustment may be needed afterwards as in this lowercase r illustrated below — before (left) and after manual adjustment.