
This was part of “Circle Secrets” ( viewtopic.php?t=580 ) when I first wrote it, but it slowed down my dial-up connection so much that I finally removed Most of it. Some parts remained in Part VI Bits and Pieces.
It was just as well, as FC improved to the point that a lot of my original instructions became moot.
A friend searched the tutorials and couldn’t find it. (I wonder why?) He just asked where it went, so here are the updated removed parts again.VI. Bits And Pieces Rounding or other fancy stroke terminations, graceful curves, and maintaining line width on angular lines are easily solved with “Construction Contours” to quickly and accurately place your final glyph points. One of your most helpful tools is glyph $0011, the period, or “Full Stop.”
I keep a special font with shapes I like to use to modify glyphs (like converting a sans-serif font to some wild serif style) quickly and easily.
You can Click Here to download the FC Shapes Tool Kit, and add whatever shapes you want to it.
Select the ToolKit as your Sample Font ( viewtopic.php?t=1409 ) and drag the contours in wherever you want.
The new Add Ellipse Button (just left of the blue arrows that move you to the next glyph editing windows) provide instant well formed circles or ellipses whenever you need them.
Just place the cross hair on a corner and drag diagonally to whatever size circle you wish. The program automatically snaps to the nearest grid for a (near) perfect circle of 100, 200 etc. units.
Serif or Sans Serif? To modify leg terminations, select a shape, copy it to the clipboard and paste it as often as desired in each glyph edit window as Construction Contours. Move the contours to the locations you like for leg terminations or whatever.
Select all involved contours and press the green button “Get Union.” Move on to the next glyph.
Spacing line widths on angled glyph lines and curves can be clumsy unless you use a circle as a spacer. Paste in a circle of the desired width and drag it around manually moving points as you go until you are satisfied.
You can also move the selected contour 100 spaces at a time using the Shift + Arrow keys, 10 spaces at a time using only the Arrow keys, or also hold down the Ctrl key to move a single space at a time.
As always, Q And W steps you from contour to contour, or from point to point, depending on which mode you are in.
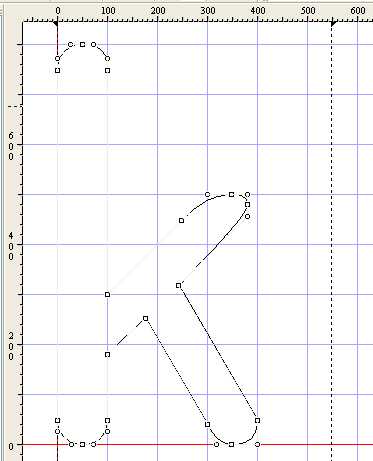
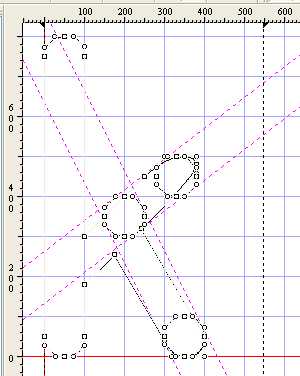
Trying to make a “K” look right was hard for me until I tried using a Location Construction Circle.
Try this. Place the circle where you want the legs to join.
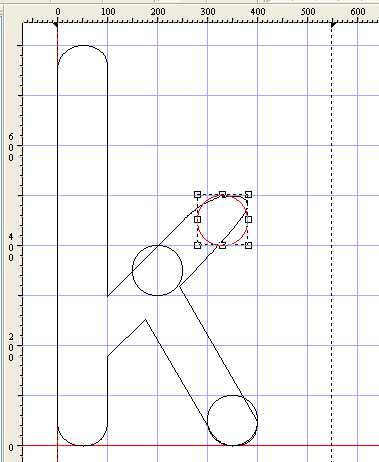
Change to Point Mode. Select corresponding points on each circle and press G twice to insert guidelines on the proper angle.
There are now two lines, one on top of the other. Grab one and move it to the other side of the circle.
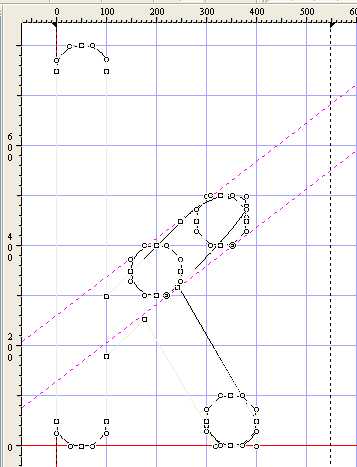
Zoom in and move the guidelines so they are tangent to the circles.
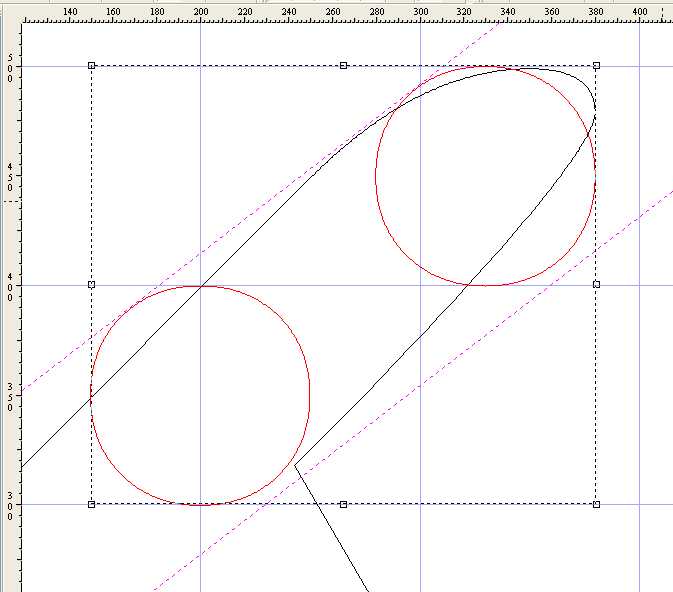
Now move your glyph points so they connect correctly
Change to Contour Mode and use the mouse to select only the remaining construction contours,
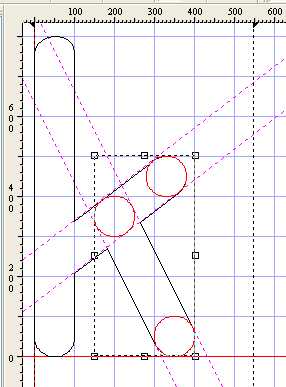
-they will turn red- then press delete.
And there is your finished glyph.
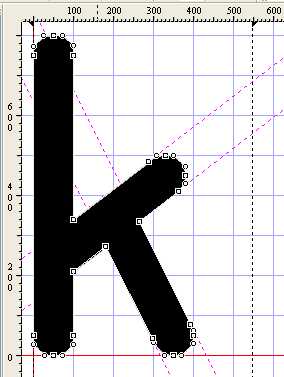
Drag off the unneeded guidelines and move on to the next glyph.