I have made a font using scannahand but I did not write in all characters. I know realize that I need the character “é”.
I have “e” and I have “´” so my idea is to be able to copy these to into the character “é”.
Can I do that?
But when don´t know which on which square(code-number) this character will be on.
It would be very nice if you could se which kind of character should be in every place.
How do I know which square to choose?
/Mattias
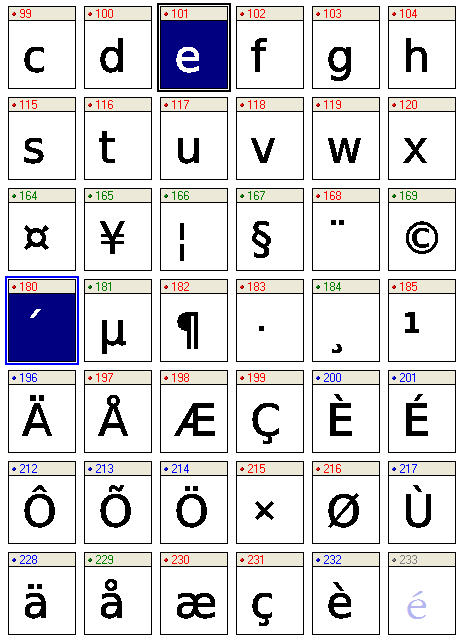
- Select both the e and the acute accent in the glyph overview.
- Copy them to the clipboard
- Open the é acute character
- Paste the clipboard contents to create a composite glyph
- Adjust the position of the accent to suit your font (acute accent should be just to the right of the visual centre
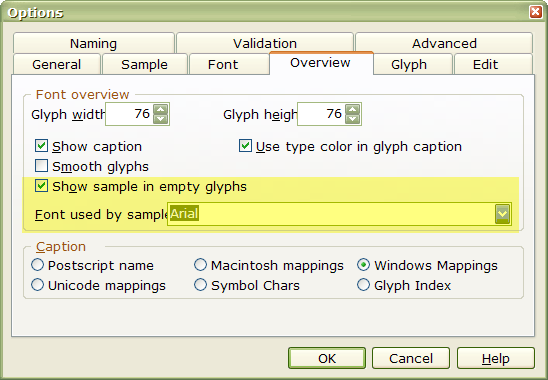
Any empty glyphs that are correctly mapped will show the default glyph from the font selected for “Font used by samples” in Tools, Options, Overview. Since your font was produced in Scanahand, it won’t have these extra empty glyphs. Start a new font in FontCreator and copy all of the glyphs across is the easy way if you have the Home Edition. If you have the Professional Edition, then use the Insert Character dialogue to add more accented glyphs to your current font.
I have the Pro version and when I open the add charcter-window I get many options to choose from. How do I know which t choose to get a “é”?
This also applies to the Insert Character dialogue. You must choose a suitable font in Options, and check “Show sample in empty glyphs.” Arial MS Unicode or Code 2000 are good choices.
I have that setting but I can´t see any character in the insert character window is it becuase there is a scannahand-import or something else?
I don´t understand all these codes like $017F and so on.
/Mattias
It is nothing to do with the font being create in Scanahand. It is still just a Truetype font just like a new font created in FontCreator, or one created in another software and opened in FontCreator. Different fonts contain more or fewer characters — that’s all. If your Scanahand font doesn’t include the characters you need, then using the Insert Character dialogue is the best way to add them.
If the letters are not displaying in the Insert Character dialogue, then they don’t exist in the font you have selected for the Sample Font or you haven’t checked the box to show samples in empty glyphs.
The $ symbol is used in FontCreator to show that the code is hexadecimal. $017F is the last glyph in the Latin Extended A character set and is the same as decimal code-point 383 = Latin Small Letter Long s = ſ
The insert character dialogue shows the character sets in rows of 16, so hexadecimal codes are arranged one under another. I prefer to use decimal code points because I am used to typing extended characters with Alt Key + Code-point on the numeric keypad in most Windows programs. Alt 383 will type ſ
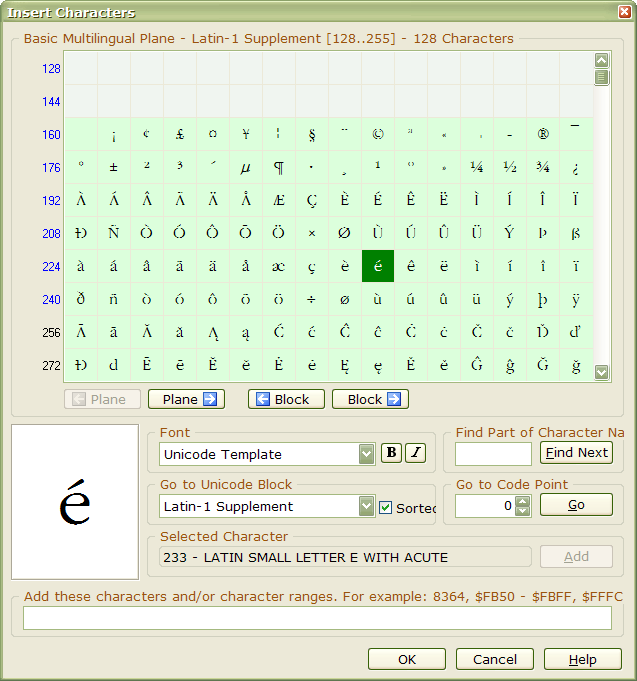
é acute is decimal code-point 233 and hexadecimal code point $00E9. It is found in the second block of characters — Latin 1 Supplement. The following screen shot shows the character set in the Insert Character dialogue, using Decimal code-points instead of Hexadecimal code-points (the FontCreator default setting). The characters are all shown in green because they already exist in my current font.
You can change the numbering scheme used from hexadecimal to decimal in Options, General.
I still don´t see the characters but when I add it to my font then I see the deafult font. so If If I did choose the wrong one I could just delete it.
Now I think I understand how I could do this.
Thanks for all help!
/Mattias
In the post above where it says that you can paste two characters at the same time and past into one new did not work for me. But I started with pasting one and the I opened the glyph fo that I wanted to copy and copied that single “figure” and then opened the new glyph and pasted it in. It was important that I moved the new pasted “figure” before it was pasted. Other wise it would have been stuck to the other “figure” in that glyph.
/Mattias
Please watch my video on Creating Composites — the section for the Home Edition begins after 30 seconds.
Or, read the Tutorial.