Is there anywhere I can see a visual of how to create a corner decoration, like an ink trap for FonCreator 16? I read the brief discription of the process in the tutorial website but honestly I am lost since I am pretty new to this.
Good question and good timing: your post prompted us to turn that brief description into a full illustrated walkthrough. It’s live now:
How to Create Ink Traps in FontCreator
It shows every step with screenshots and assumes no prior experience. At the bottom you can download the example project with everything already set up, so you can open it in FontCreator 16 and poke at a working ink trap right away.
The short version of what you’ll do:
- Create a glyph named
_corner.InkTrapand draw the notch (the shape of the cut you want at the joint) as a small open path. - Add three anchors to it:
originon the corner point,lefton the entry side,righton the exit side. - Open a glyph with a tight joint (the V in the sample is ideal) and click the single on-curve point inside the crotch, where the two diagonals meet.
- Choose Glyph → Path Decoration → Add Corner Component… and pick
_corner.InkTrap.
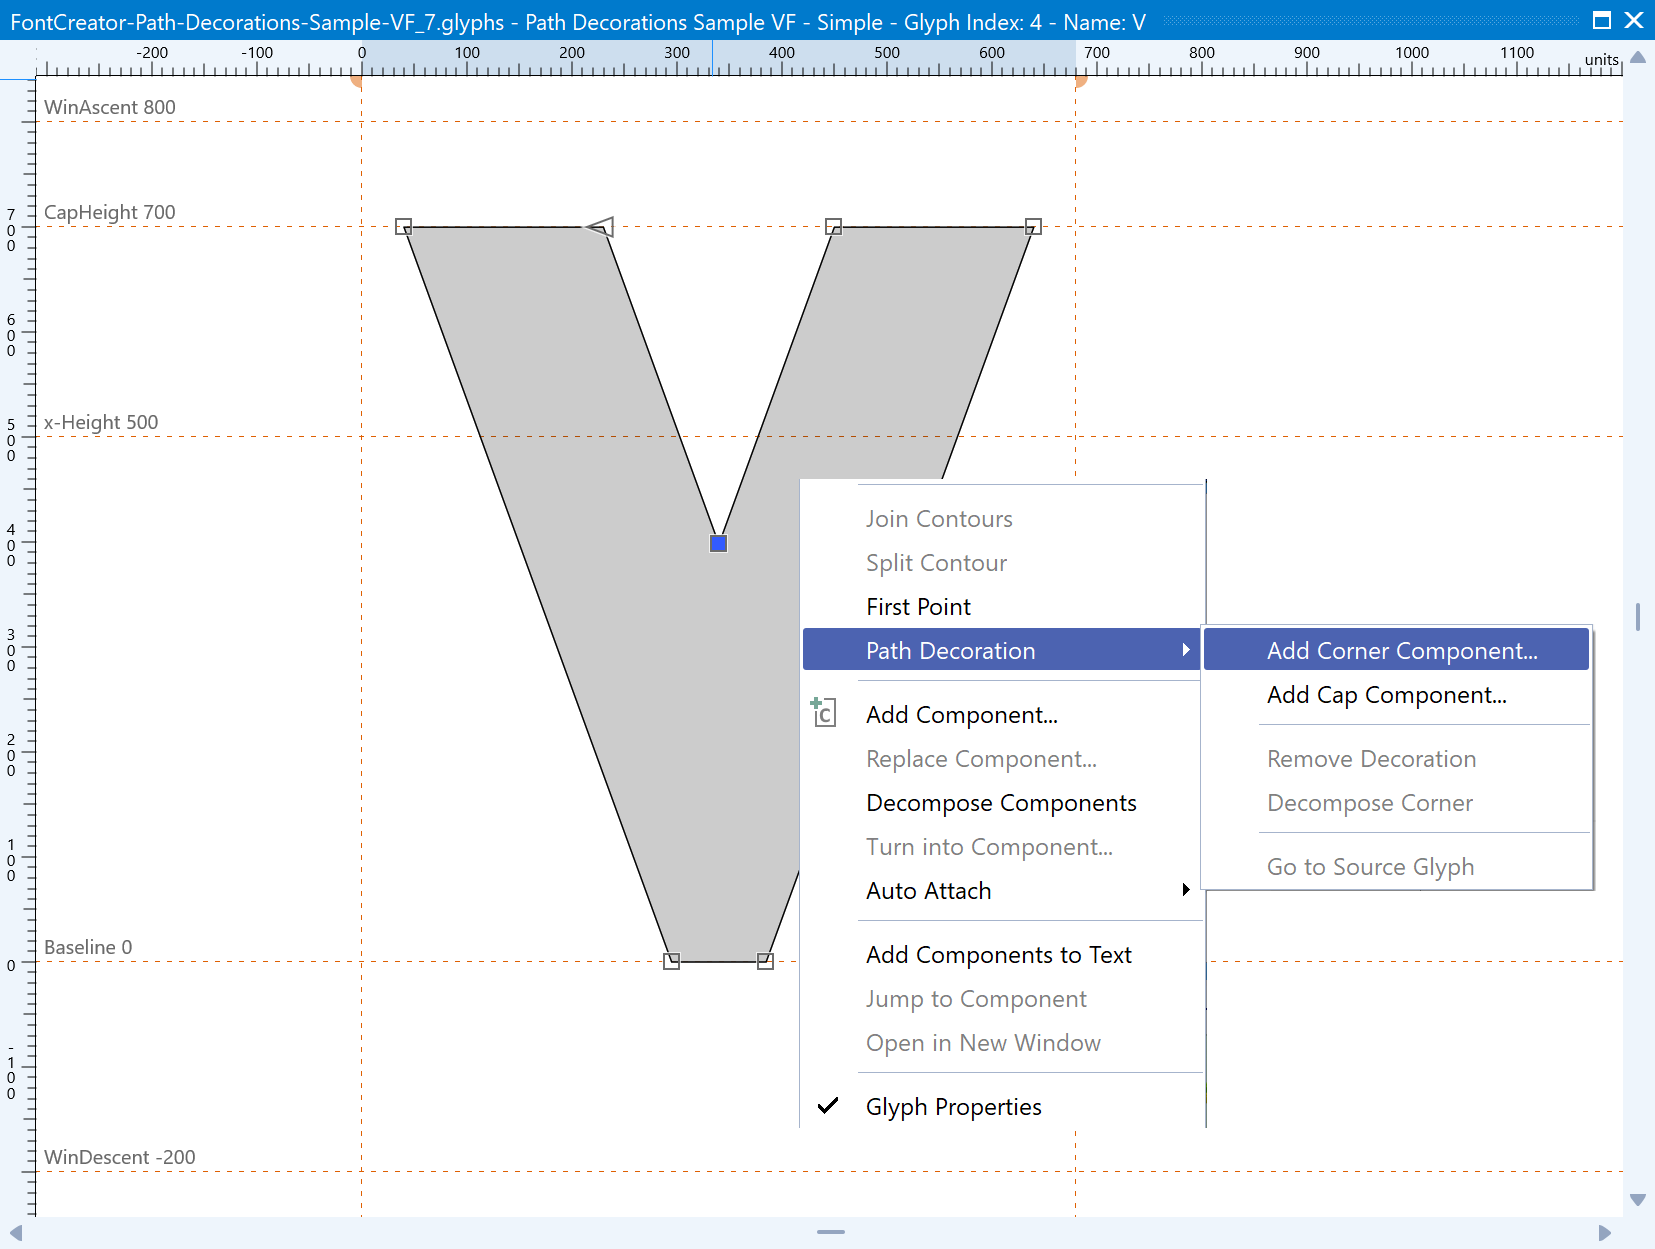
The notch is cut into the joint and the rest of your outline stays untouched. The same donor works on every joint that needs it (W, M, N, A…), and here’s the payoff: edit that one donor glyph and every trap in the font updates at once. In the sample project the V and W are trapped; the M is left untouched on purpose, so you can try it yourself.
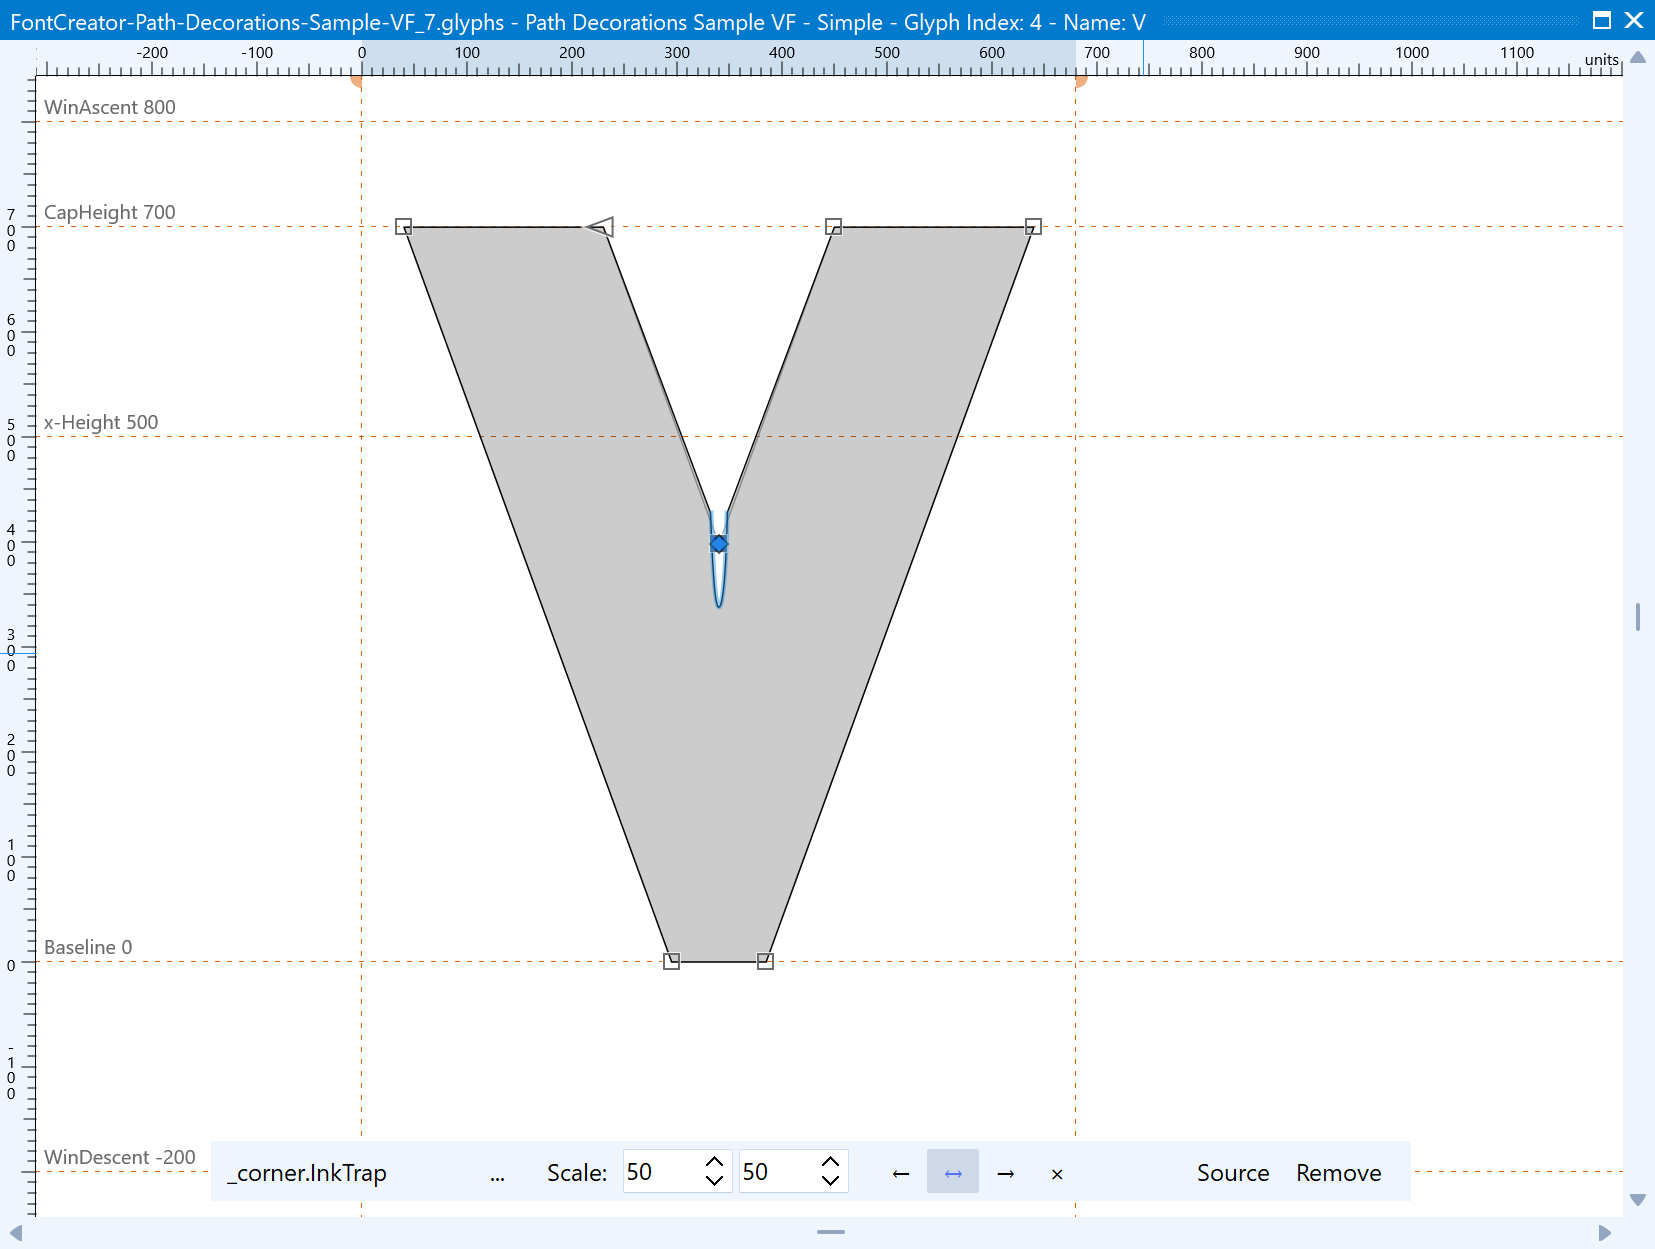
Ink traps are one use of a more general mechanism, as the same Corner Decorations also do serifs, notches, and stem caps. When you want the full picture, that’s covered in:
Reusable Corners, Serifs & Caps with Path Decorations.
Thank you! This is exactly what I was looking for. I only have a couple more days left on my trial but I will give this a try. I already have 3 or 4 fonts I have started sketching out and one is currently in process using FontCreator. Thanks for your help!
1 Like