Font Creation from png Images

Currently trialing the software in the unregistered version but i would like to clarify some stuff on how to use Font Creator to do certain things before I make up my mind on whether to buy the software. Need help on being familiar with the features first before buying.

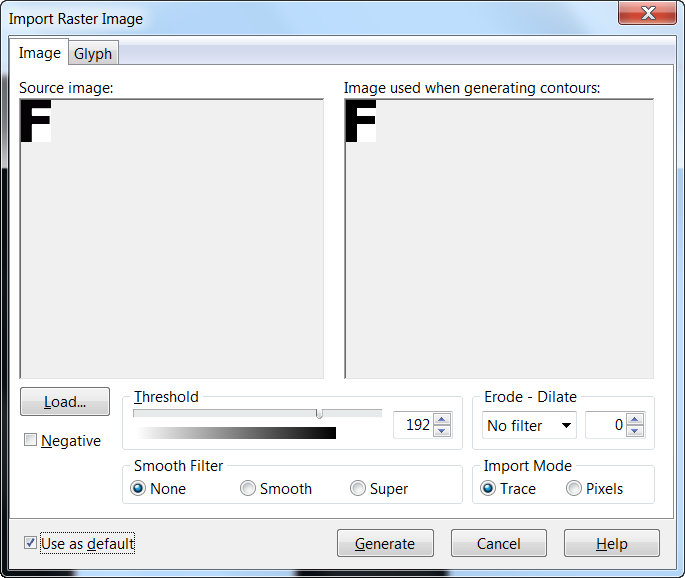
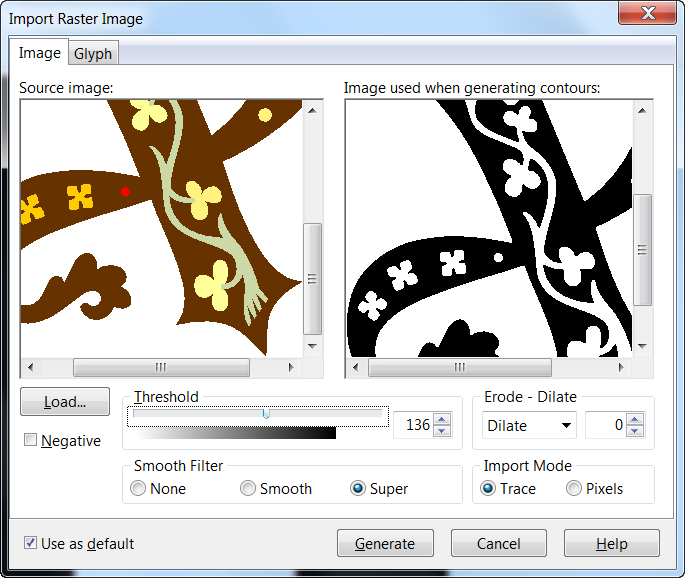
I already have letters and numbers of the font i want to recreate as high resolution png images in my computer. My plan is to upload all of them into Font Creator as an image and then pass that off as a character. How do i go about creating a valid font character after uploading them in?

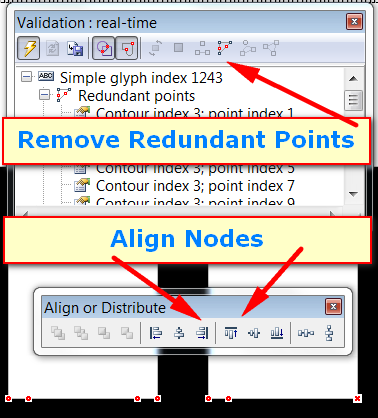
Additionally, when i was playing around with the software, i noticed that when i uploaded the image of the letter in, some corners and curves of the letter were modified slightly thus the letter became slightly out of shape. Not so obvious from afar but quite obvious when zoomed in. How do i fix up these corners and restore them to normal state?

  1. You can Drag and Drop an entire alphabet into a new font as long as they are named to be sorted in the right order. FontCreator converts them all into TrueType vector curves on importing them.
  2. If the image are high resolution, this might take several minutes as FontCreator traces bitmaps to convert them to curves. If you first import one image from the Import Raster Image dialogue, you can set the default settings to use on import. If your characters have straight sides and sharp corners, use the vector setting. If the images are colour or noisy, adjust the threshold.
  3. If your images were AI or PDF vectors, the import would be almost instantaneous, and the sharp corners would still be sharp.
  4. After importing, scale one glyph to the desired size using the Transform Toolbar (F6), remembering the scale factor used.
  5. Use undo to try different values until you are satisfied that you know the best value to use, and finally undo again to leave it at the original imported size
  6. In the glyph overview, select all of the imported glyphs
  7. Use Tools, Glyph Transformer, Outlines, Scale, and Metrics side-bearings, to scale all of the glyphs by the same amount and set some default side-bearings (50 funits or whatever).
  8. By default, all imported images are placed with the bottom left corner at 0,0 on the axis. If some glyphs have descenders, you can select those glyphs in the overview and use the glyph Transform wizard to reposition them. A negative vertical value will move them down so that descenders are below the baseline.
  9. Save your project before running Glyph Transformations, as they cannot be undone. Reopen the font if you mess up completely
  10. Run Tools, Autometrics, Optical metrics to adjust the side-bearings automatically. This may take about fifteen minutes, so take a break while it’s running.
  11. To avoid round corners, see the post below.
  12. To square off the rounded corners, open the glyph edit window, and switch to points mode. Select all nodes that should be in a horizontal or vertical line, convert them to on-curve points with the shortcut N, and align them with the Align toolbar.
  13. Enable Automatic glyph validation (F7) and remove redundant nodes.

Sharpen Rounded Corners.png

For images with sharp corners, use the “None” option for the import smoothing filter.
No Smoothing.png
For colour images or noisy images from scans, adjust the threshold carefully.
Threshold.png