Definition
A backup / temporary layer hosts a glyph outline. A user can view both the backup layer and the master layer. The backup layer can offer reference for drawing on the master layer. The backup layer must not be exported to the font.
Background
Recently I switched to FontCreator macOS version from Glyphs, the only feature I am missing from the Glyphs is the backup layers (Layers — Glyphs Handbook).
(Tip: If the Chinese character mentioned below is not rendered properly, you can install BabelStone Han from BabelStone Fonts : BabelStone Han)
In Glyphs, to draw a glyph for an unencoded Chinese character ⿰氵𭍬, reusing the glyph of U+2DC7F 𭱿 and U+2D36C 𭍬 from BabelStone Han, I will create two backup layers as reference for the new glyph:
- The glyph of U+2DC7F 𭱿
- The glyph of U+2D36C 𭍬, horizontally scaled such that the right component 𭍬 fits the right component of 𭱿, that is, 圊. The scaled version can not be used directly as a component of ⿰氵𭍬, because the width of any vertical stroke in the 𭍬 character will also decrease due to the horizontal scale.
Now in the master layer, I can remove the 月 component from 𭱿, and then copy & paste the 貝 component in U+2D36C 𭍬 to the master layer. Of course the 貝 component in 𭍬 is too wide to actually fit in the ⿰氵𭍬.
The next step, is to carefully scale the 貝 component such that it preserves the vertical stroke width, and then the y-coordinate of the scaled 貝 component should be aligned with the 貝 component in the second backup layer. Doing so ensure that the y-coordinate of 貝 component is consistent between 𭍬 and ⿰氵𭍬.
Here is the screenshot of Glyphs.app: I am working on the Regular layer, and mark the second backup layer visible
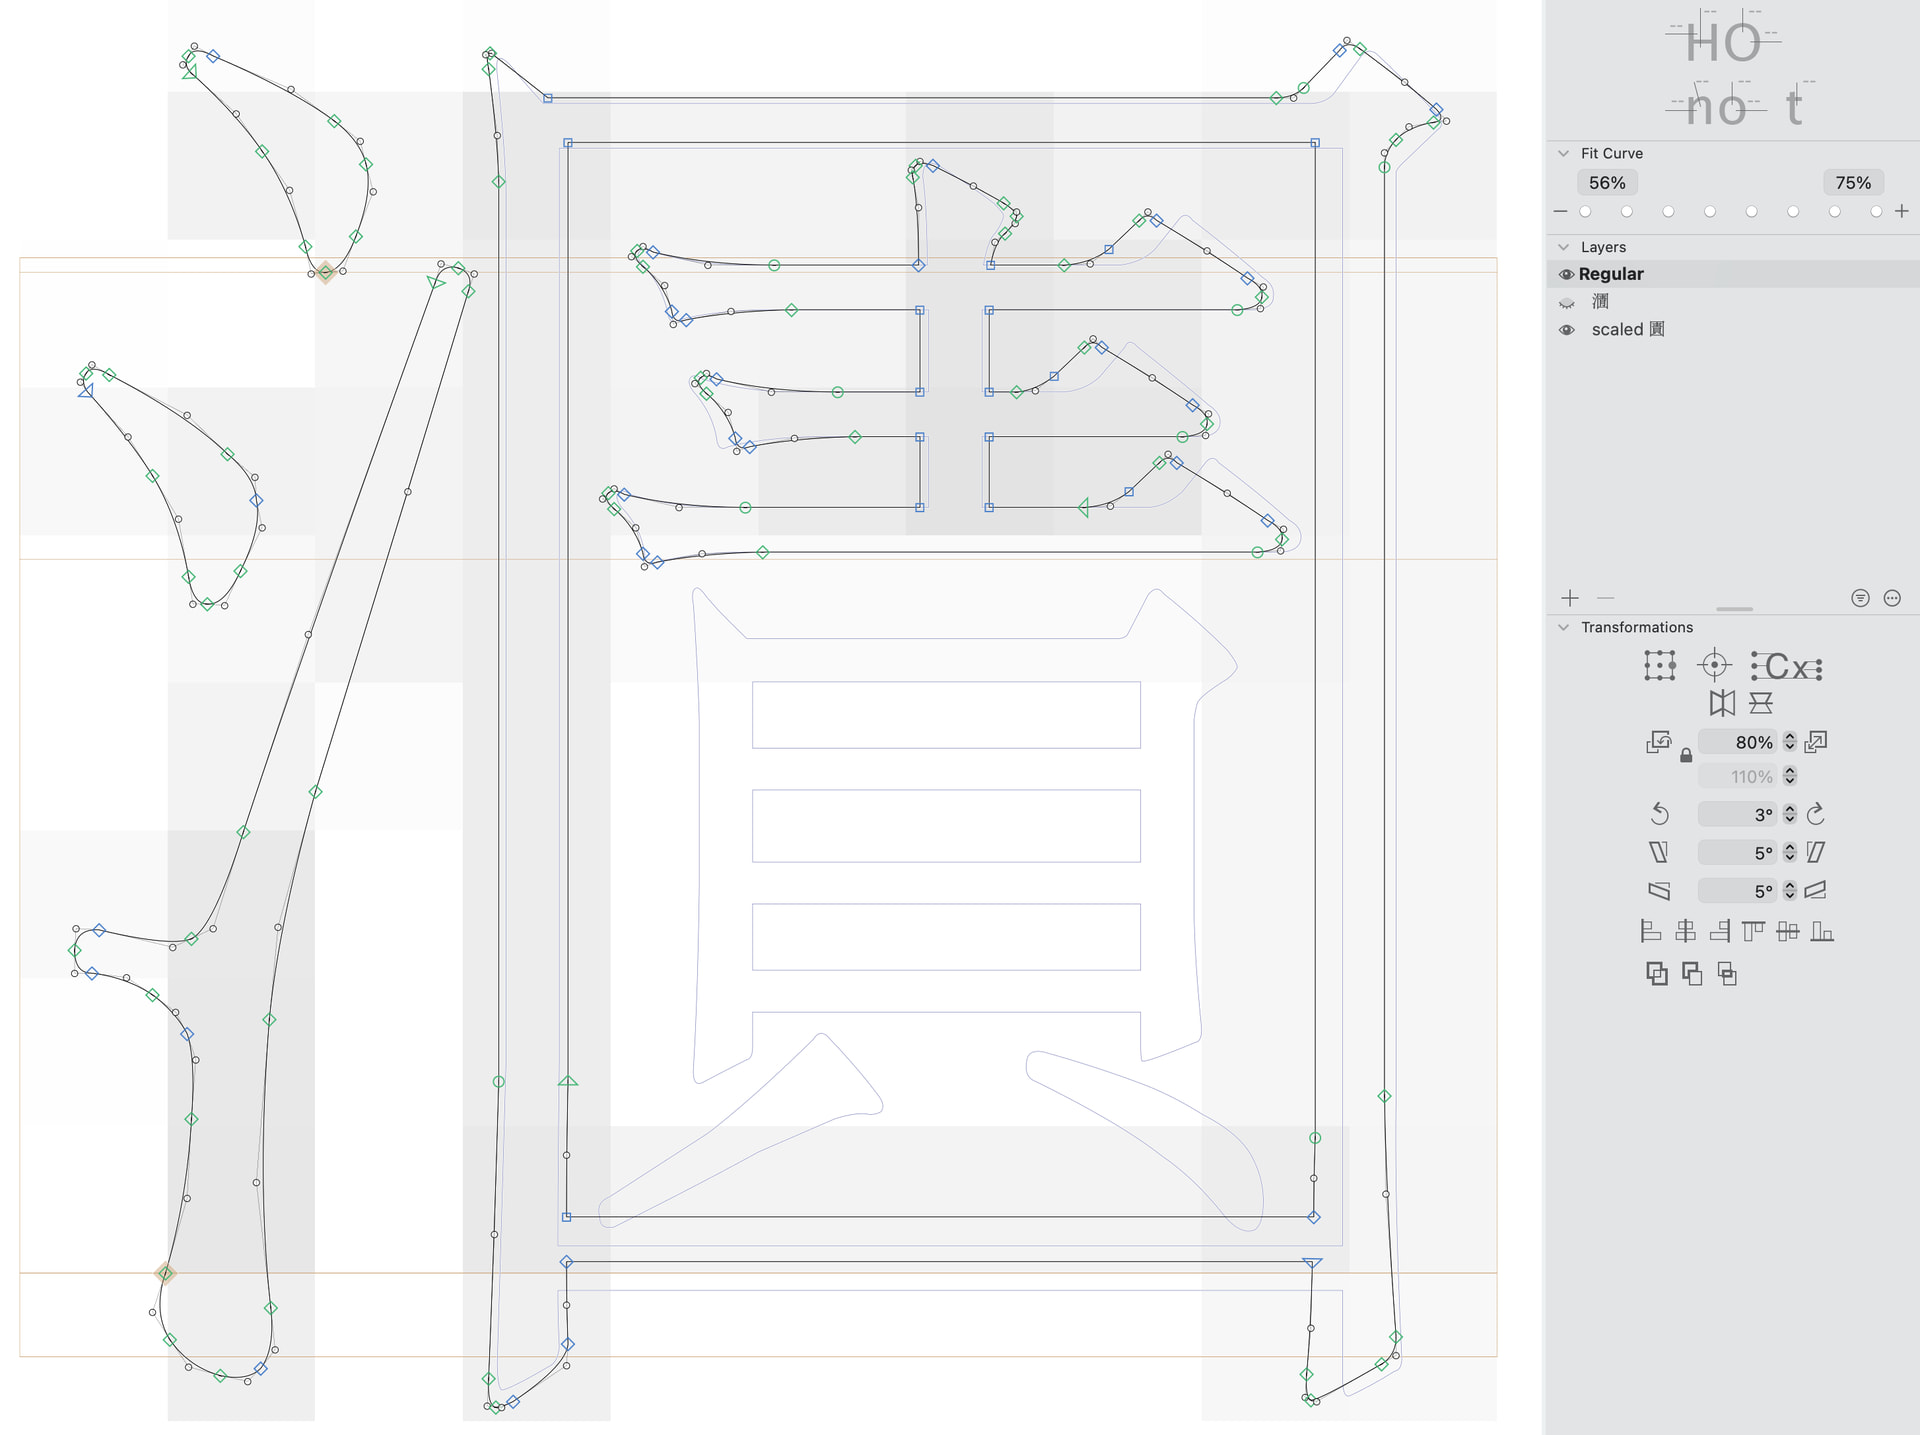
As we can see from the backup layer, to fit 貝 in the right hand side ㇯圊月 component, we have to also slightly lower the bottom 一 stroke, such that 貝 is not touching the 囗 component.
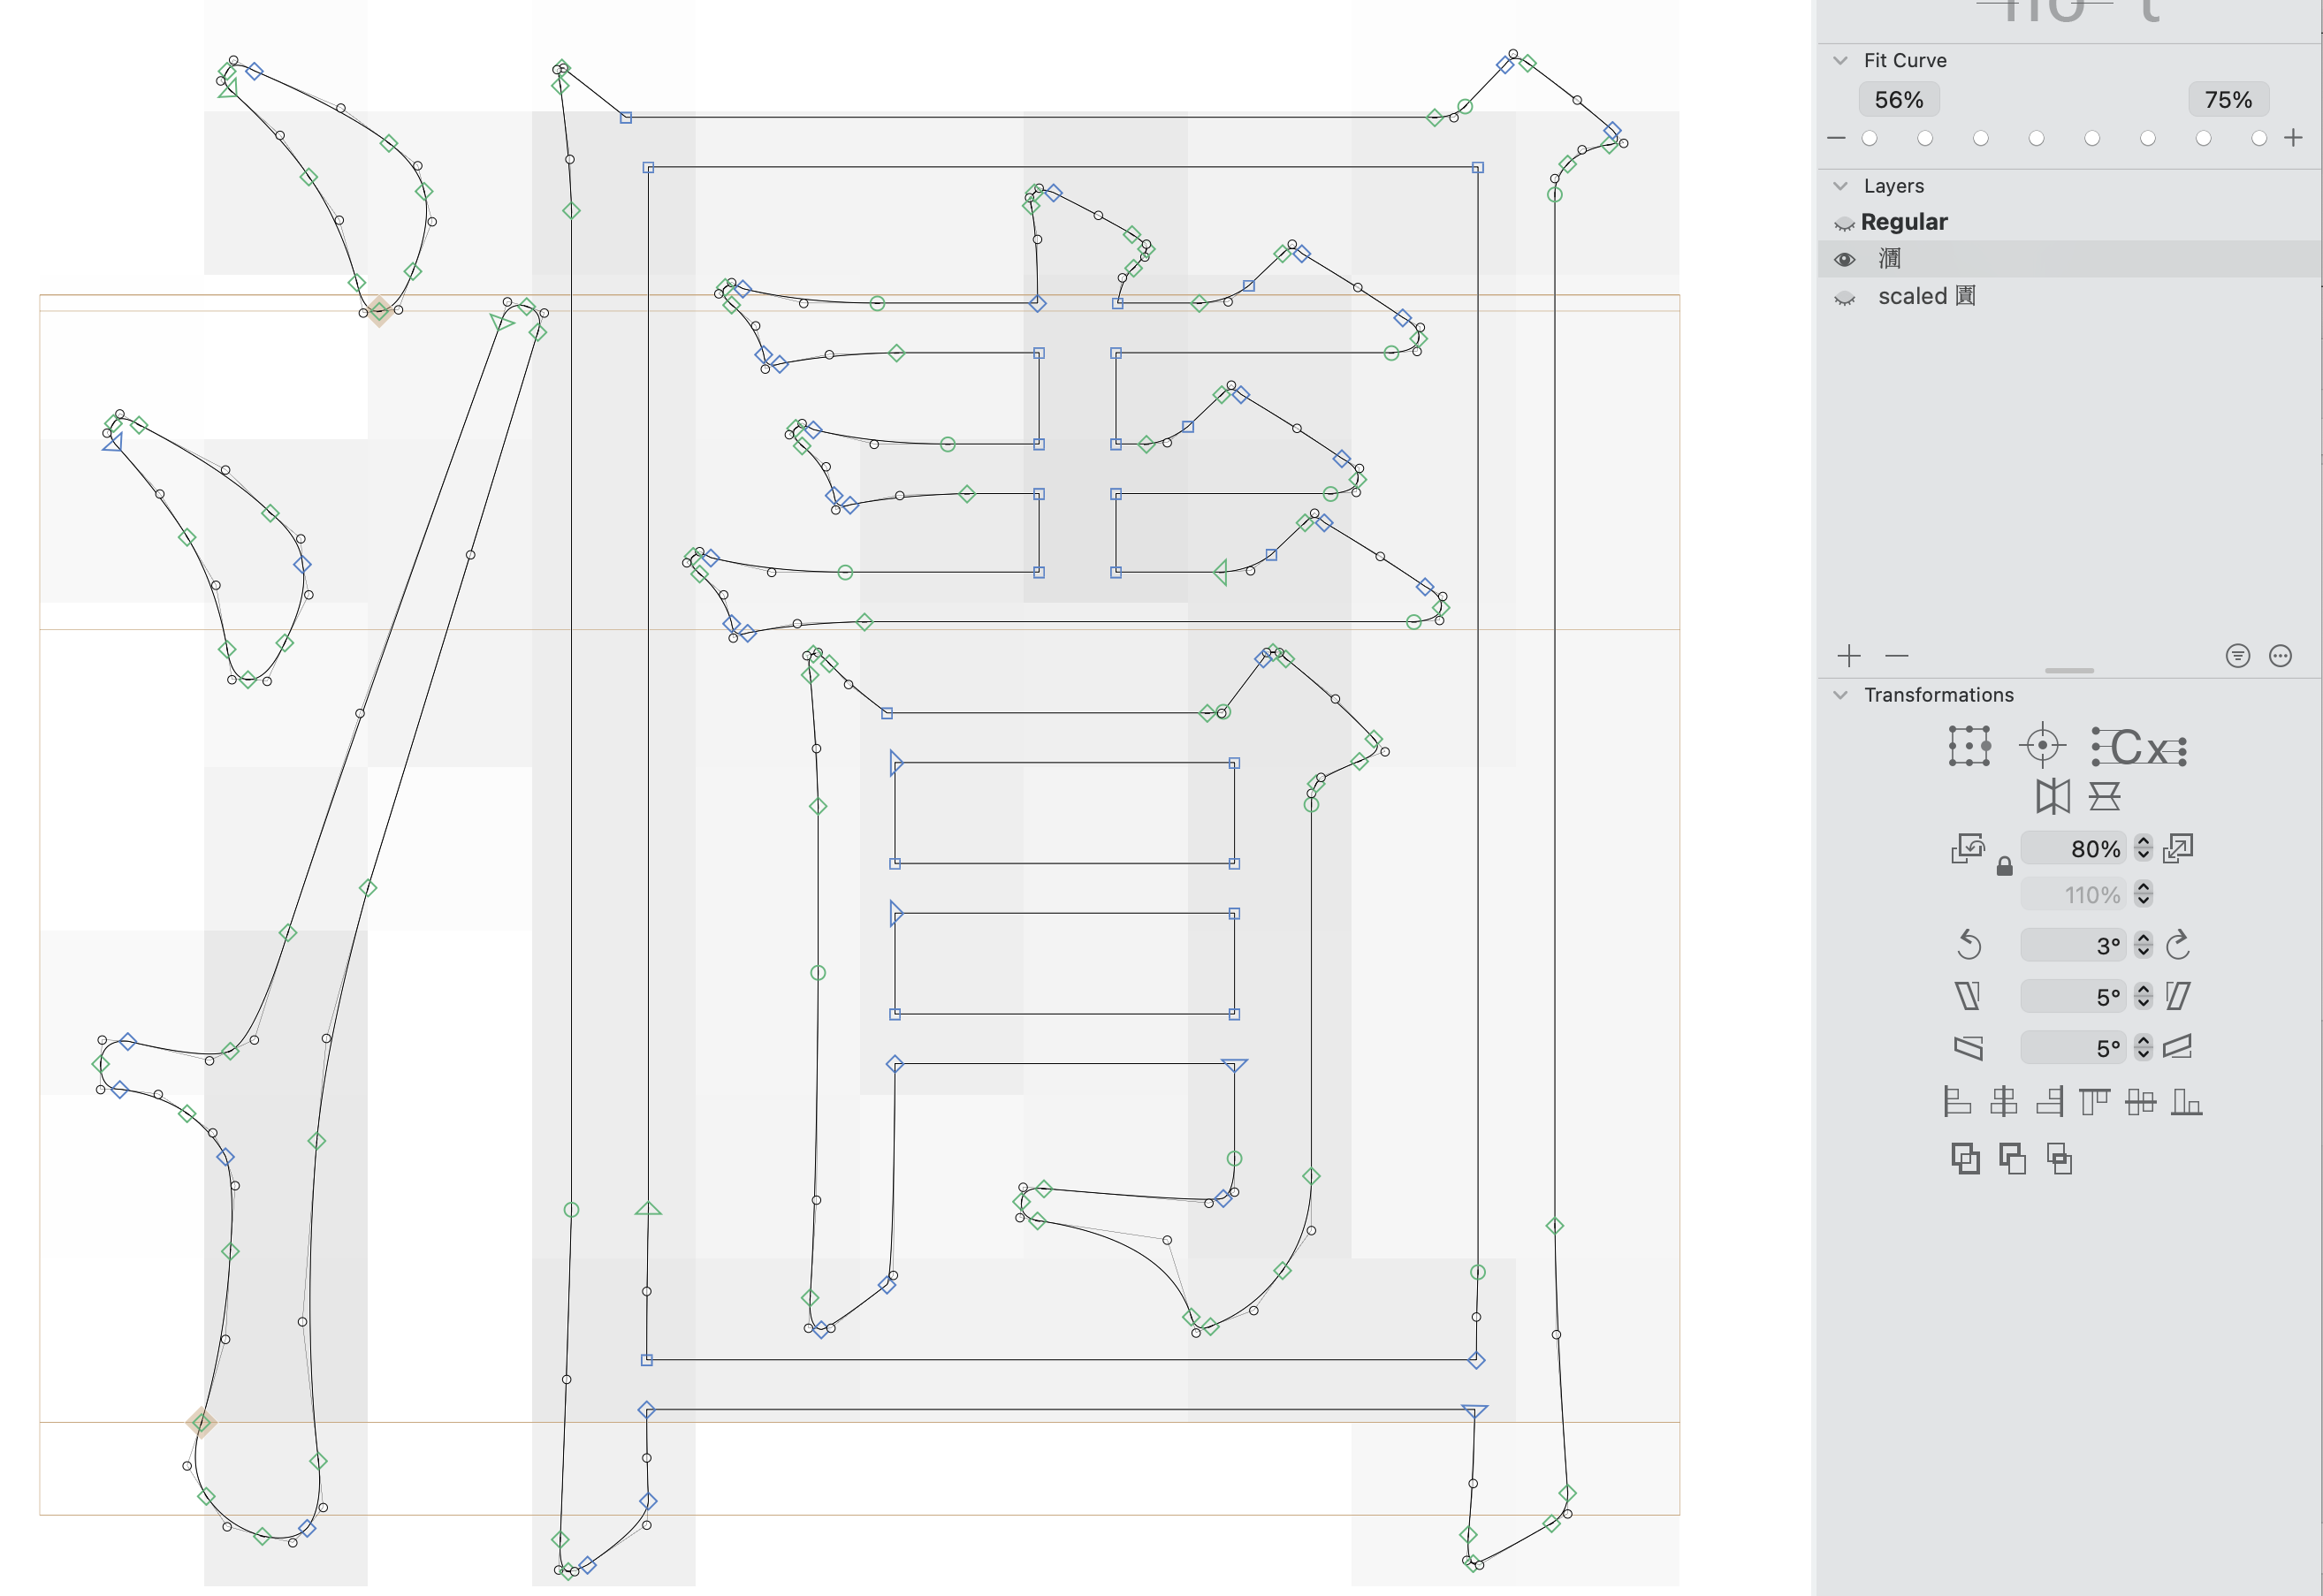
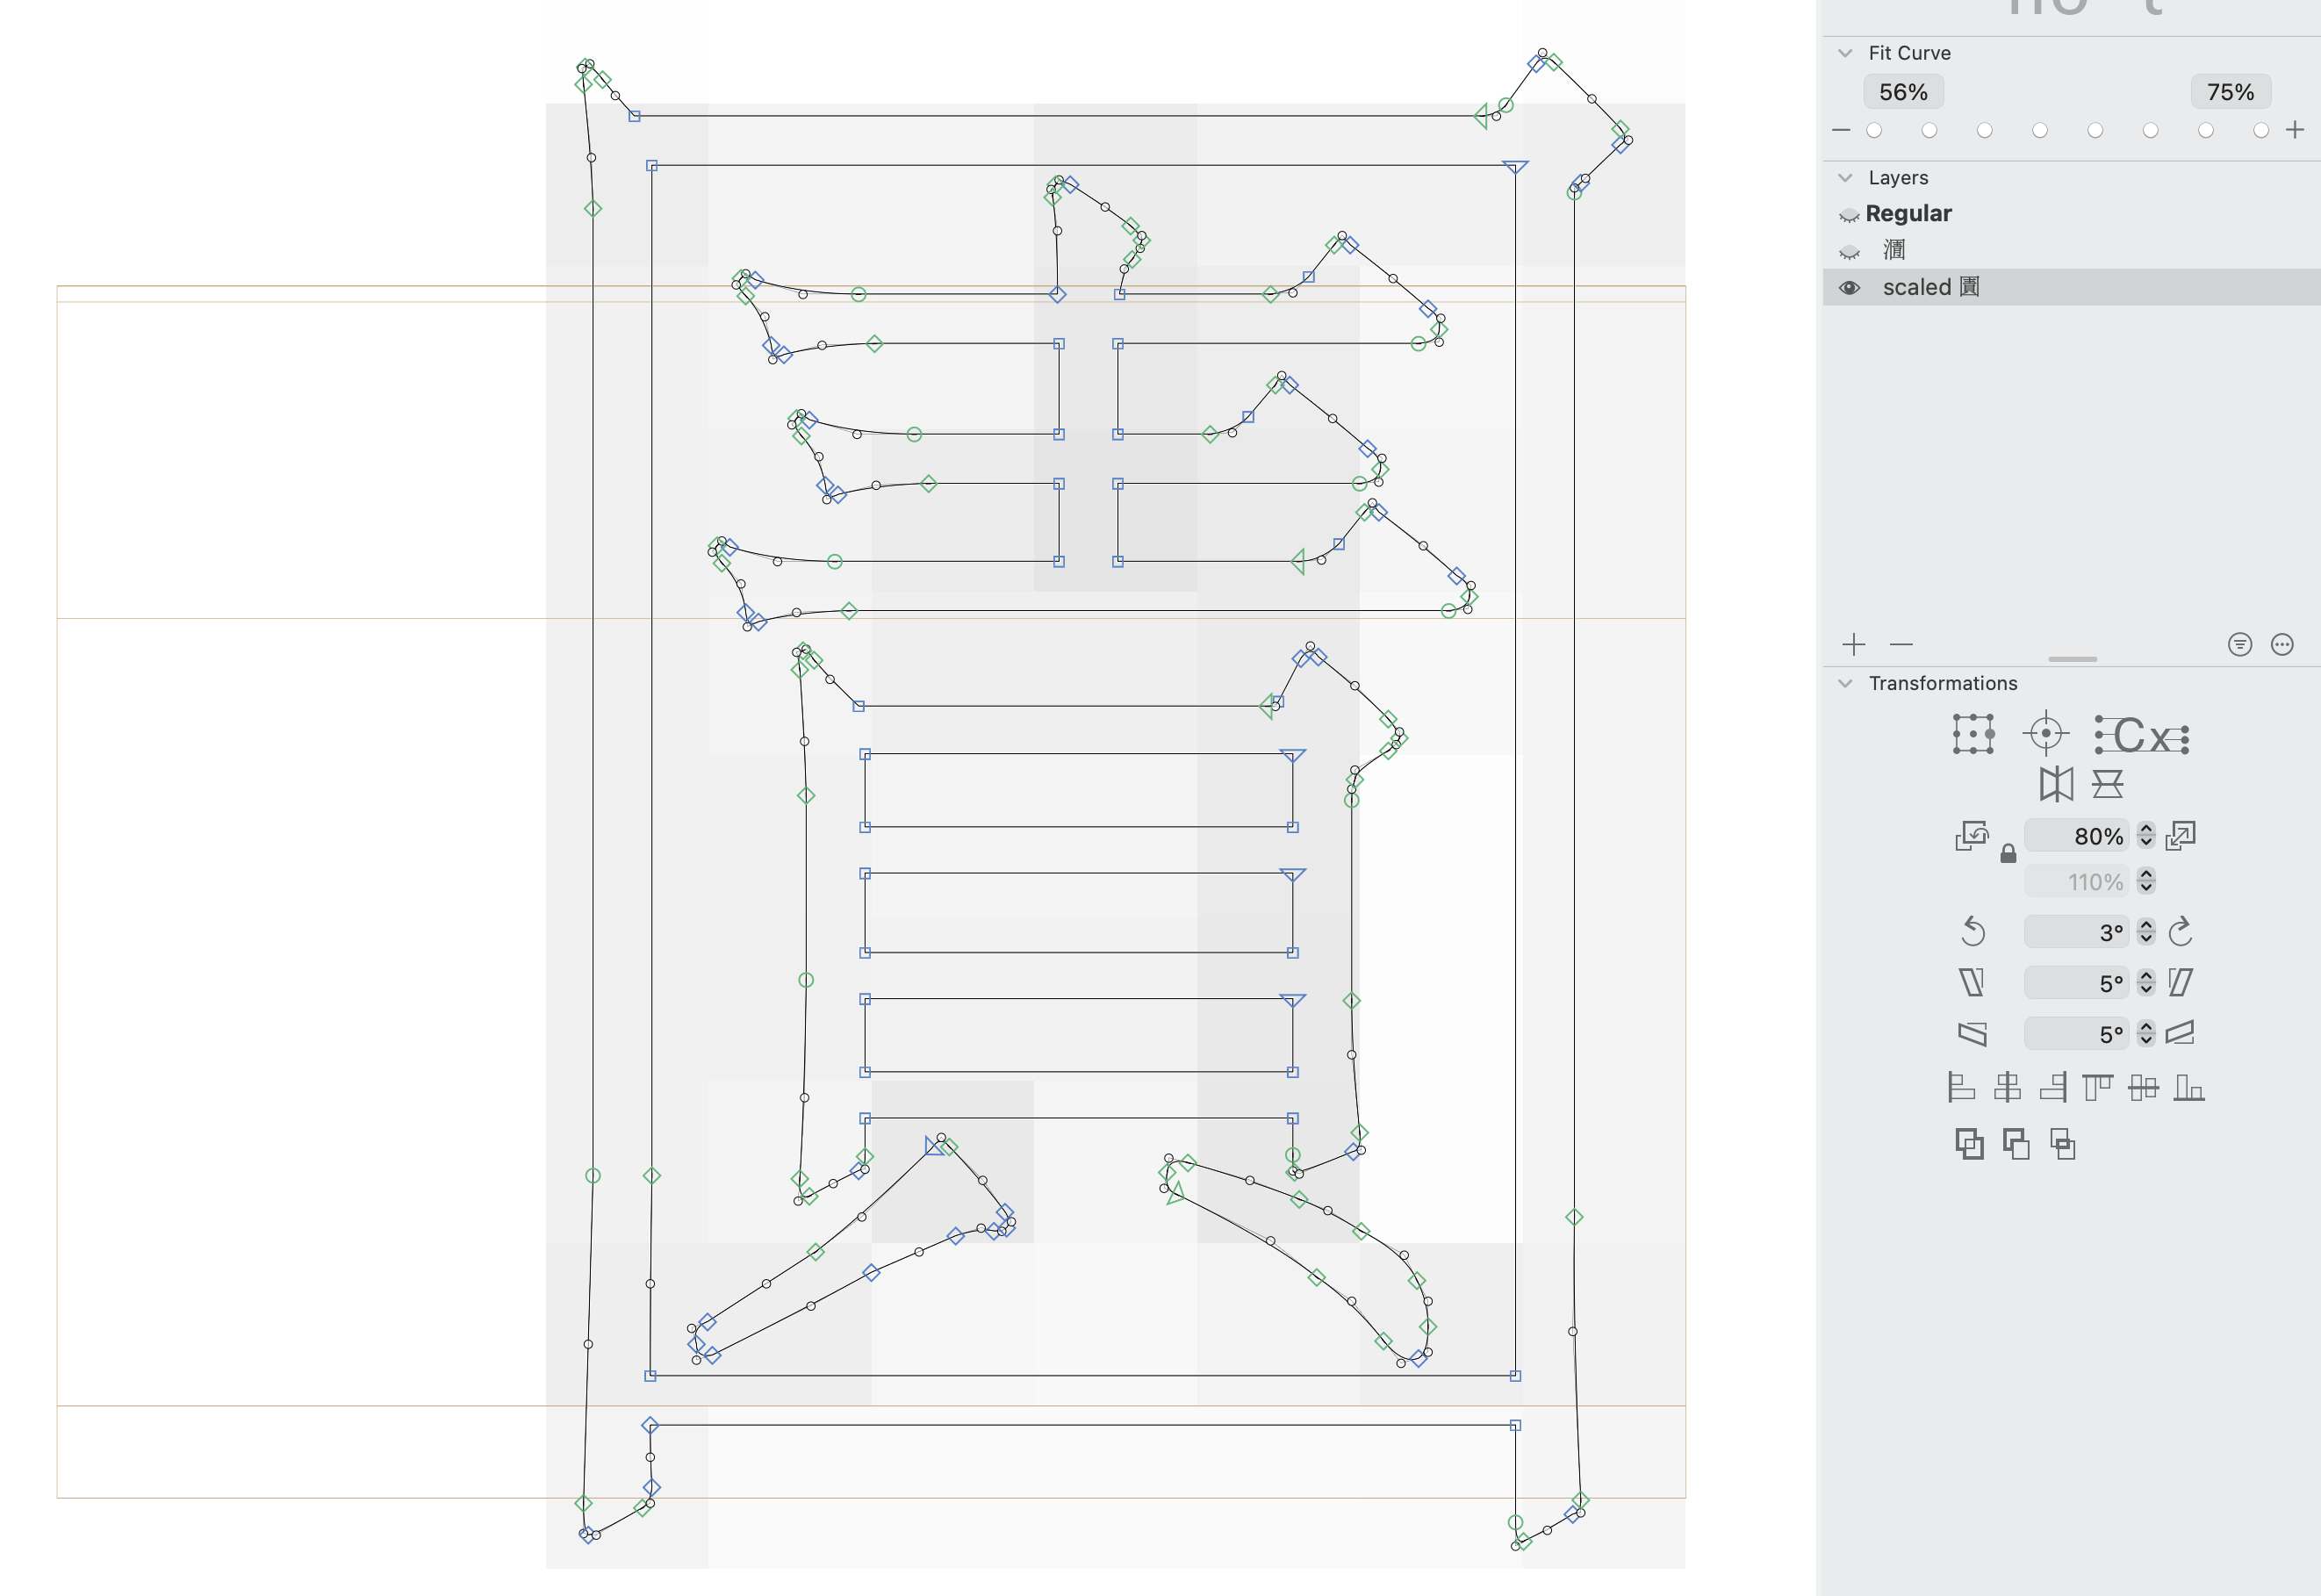
For reference here is outline of each backup layer:
Layer 1 𭱿:
Layer 2 scaled 𭍬:
I am still pretty new to the FontCreator, there is a high chance that a similar feature has been already implemented but I am not aware of. Thank you for reading.