As long as there are not too many colours, it is fairly easy to do. My glyphs use four colours.
If you have any questions about this tutorial, please ask in the FontCreator Support Forum.
To see the coloured glyphs visit my Web Font Test Page using Vivaldi, Firefox, Chrome, or Edge.
Stage 1:
- Copy the glyph
- Insert a new glyph after it
- Paste a copy
- Repeat for the second and third copies
Stage 2:
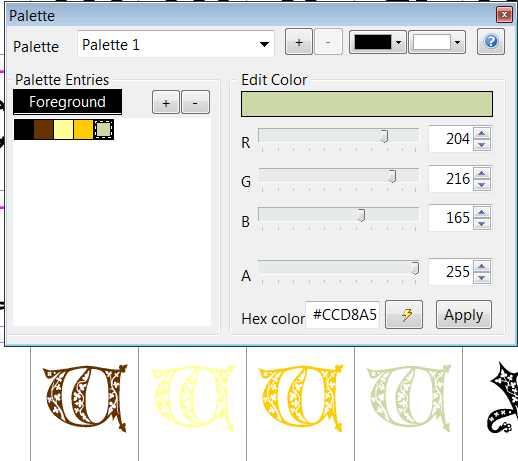
- Delete unused colours from the palette
- Edit the four colours that you need using a colour-picker tool
- Apply the four colours to the original and three copies from the right-click menu, Colorize to selected color
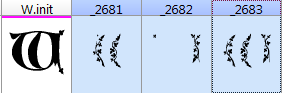
- Name the glyph copies for easy identification: I used W.init for the original, W.yellow for the light yellow member, W.ochre for the dark yellow member, and W.green for the green member.
Stage 3:
- Open the glyph edit window and toggle off the colour mode (shortcut C) to edit each colour member
- Edit the light yellow glyph member, deleting all contours that will not be light yellow
- Move right (Alt right cursor) and repeat for the dark yellow and green members.
Stage 4:
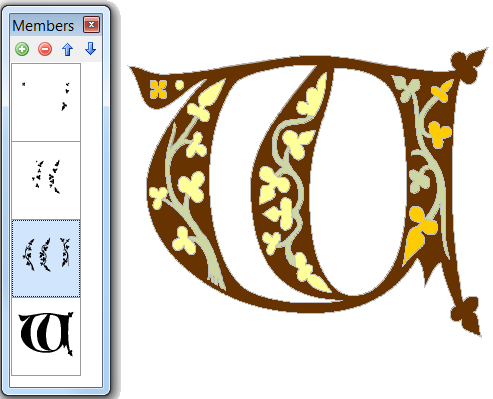
In the Original glyph, show the Members toolbar, and insert the other three coloured members.
Stage 5:
Change the stacking order to move the green above the brown, the ochre above the green, and the yellow above the ochre.
Users of FontCreator 9.0 can open my attached Project file (Odana.fcp) to see exactly how the coloured glyphs are designed. Users of earlier versions can obtain the exported OpenType font from my
Free Fonts Page.
Odana.fcp (324 KB)
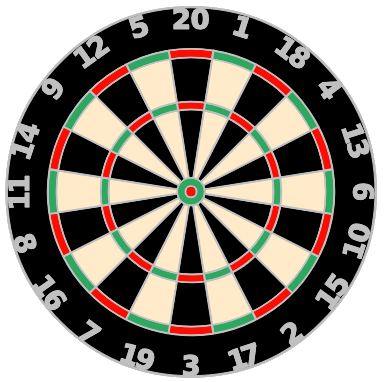
A Coloured Dartboard Glyph
Creating a coloured dartboard glyph was not too hard using the graphics tools available in FontCreator. If you want to try this exercise yourself to become familiar with the techniques, here is a step by step guide to the design process.
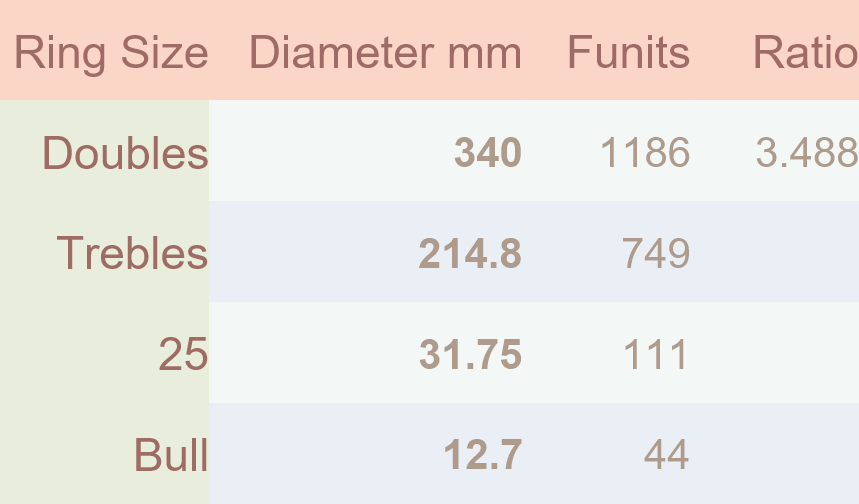
1. Get the Proportions Right
Look at the official specifications and use a spreadsheet table to calculate the right sizes for each ring to suit the size of symbols in your font. A New Moon symbol or Geometric Shapes, Black Circle, which overshoot the baseline and Caps Height are a suitable size to use for the dartboard symbol.
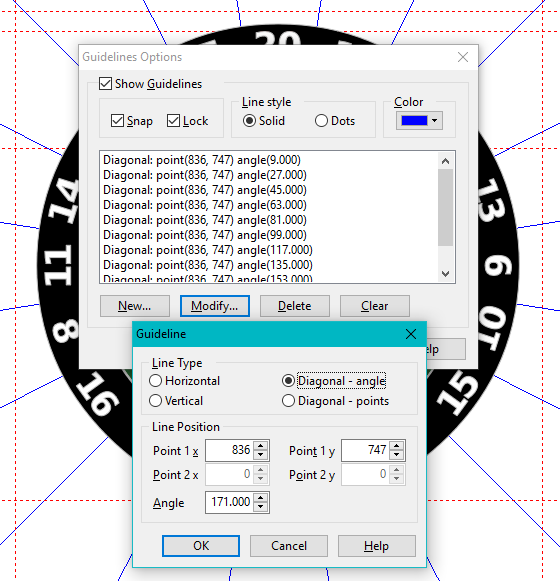
2. Create Diagonal Guidelines
- Select two nodes on the horizontal centre-line of the circle
- Press shortcut “g” ten times to create ten identical guides passing through the vertical centre-line of the symbol
- Note the co-ordinates of the horizontal centre-line
- Double-click the rulers to open the guidelines dialogue
- Modify the first guideline to be a diagonal guide passing through the centre of the symbol at an angle of 9°
- Modify all of the other guidelines at increments of 18° as shown in the screenshot
- Keyboard shortcuts: Alt+M = Modify, Right, Left, Tab, and Copy/Paste can speed up the process.
3. Insert the Numbers
- Insert a temporary glyph before the dartboard symbol to use as a pasteboard.
- Insert composite glyph members 0-9
- Scale each glyph member to the desired size (I used 0.0518 as a scale factor)
- Move each composite glyph member using Shift+Right and/or Shift+Down to prevent overlap
- Make simple and copy to the Dartboard symbol
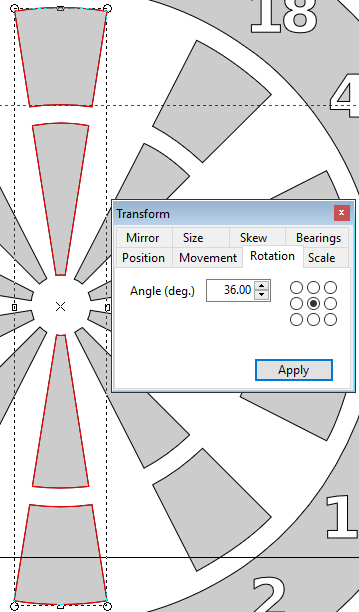
4. Copy and Rotate
Use the Transform toolbar to copy and rotate pairs of symmetrical contours to the desired angle.
Do the same to rotate the figures. Enter a negative angle to rotate clockwise.
The End Result
Ask any questions about these tutorials in the FontCreator Support forum.
Some new features in FontCreator 13 made creating multi-coloured fonts a whole lot easier.
- Copy/paste of coloured font data
- Import/Export of palettes
- Sort glyphs from a text file
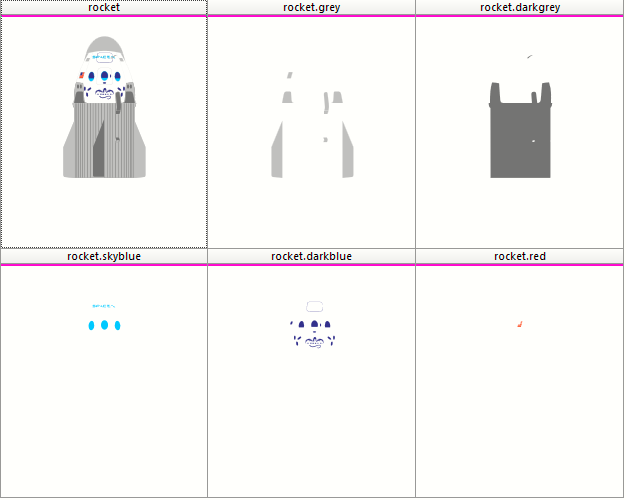
Instead of rebuilding the stack of coloured glyph members in the right order, one can fix it for one font or style, and copy the data to other fonts with Paste Special, including both font outlines and colour data. My rocket glyph has six members.
Designing the Glyph
- Design the glyph as a monochrome glyph, smoothing the curve, and removing any overlapping contours or off-curve extremes
- Copy the entire glyph to each of the coloured glyph members to ensure glyph metrics are identical for all
- Delete the unwanted contours from each coloured glyph member
- Add the coloured glyph members to the coloured glyph
- Change the stacking order as required (Optional: Sorting the glyphs can ensure that they are automatically added in the right order)
This topic is locked. Please ask any questions about the tutorials in the FontCreator Support Forum.